Wednesday, March 6, 2013

Journey Into Pastels

I've begun exploring a medium that is new to me.. pastels.  So here is a summary of the beginning of my pastel journey.

The first, full-color pastel painting I attempted was for an online course I am following with Art Tutor.  Our week one task was to paint the final project.  Backwards, yes?  But with a grand purpose of seeing where our skill level is at the start of the course compared to the end (after we'd done all of the wonderful learning stuff in between).  It was quite fun actually, to just jump right in having no idea what I was doing,  a rather liberating artistic experience as I'm a bit of a control freak in my subject choices and how I go about it.

I'm glad that I started experimenting with watercolors first because that really helped me to understand colors and how they work together.  There is only so much color blending you can do with pastels and, just as with watercolors, too much blending will leave you with muddy, dull colors.  I was rather pleased that my first attempt turned out as well as it did, although I did make one big mistake.  I "misread" the original reference image (Rebecca de Mendonca's "Floating") and I incorrectly positioned the dancers front foot.  As you can see below, this threw off the flow of the entire painting.  So, right off the bat, I had to learn how to correct a mistake in pastels.


I was able to do so without too much trouble.  I did learn, after the fact, that having a mid-tone or neutral under-painting (preferably in a non-staining color) helps when it comes to correcting mistakes.  I wasn't able to achieve the color luminosity that was in Rebecca's original painting though.  I'm not sure why yet- if it's about under-painting or if I needed a darker background for contrast or what the trick may be- but I'm looking forward to progressing through the course and finding out.

I was so excited about how well this actually turned out considering I knew NOTHING about pastels (a little toot of my own horn there) that I couldn't wait to see what I could do once I actually learned something.  So I turned to the amazing instructors at Art Tutor and absorbed several of the videos available in the Pastels Foundation Course.

Arttutor.com, by the way, is a UK based website and not only is there a TON of instructional art videos and learning courses, you get to learn from instructors with the most lovely and interesting accents!  The artist community there is very supportive and encouraging (they helped me to improve my dancer pastel painting).   Check it out.   You can try it for a whole month to see if you like it for a fraction of the cost of just one workshop.

Since watching some of the other pastel videos, I have done another pastel painting which will be the subject of my next post. 

Until then, I'll sign off by saying, Happy Birthday Michelangelo !!!

Tuesday, February 26, 2013

Ink and Charcoal

It was somewhat surprising for me to see that it has been almost an entire year since I've posted anything here.  For a large part of that time, I'd been distracted by non-art related things; during the last six months, however, I've actually been quite productive in learning and producing art.  I joined a fantastic website packed full of art instruction videos, downloads and helpful advice from other artists.  If you'd like to check them out, here is the link: Art Tutor.  There is a subscription fee to join but for anyone who has ever taken an art workshop, you will quickly see that the value you are getting for your money is incredible.  This site has really inspired me to step outside of my artistic comfort zone and explore other mediums and techniques.

So, I'm actually learning again... and since the main point of this blog has been for me to share with you what I've learned, the timing for jumping back in couldn't be better.

Let's start with ink and charcoal.  Joanne Boon Thomas often uses this method to do quick gray-scale studies and map out tonal values for her watercolors.  She has a video on Art Tutor called USING CHARCOAL: YORKSHIRE COTTAGE that explains this technique.  After watching her video, I gave it a try and the barn image below is the result.

Route 250 Barn
Route 250 Barn, 8x10 Landscape, Ink & Charcoal
Copyright 2013 Sarah Diane Salisbury
For reference, I used a photo I had taken about seven years ago of an old, (seemingly) abandoned barn I passed along the road on my way to work every day.  It seemed like ink and charcoal would be the perfect technique to capture the character of the building.  I initially did a line drawing of the image using a Faber Castell Pitt artist pen, superfine nib, in black.  Pitt pens are my favorite for any ink work.   They write smoothly, are made with waterproof, lightfast india ink and come in a variety of colors and nib sizes.  I did the initial drawing in pencil and then went over the lines I wanted to emphasize in ink.   I didn't use a ruler with this because, well, I don't think there was a straight line on this old barn and I felt that a free hand helped show how aged and worn it was.  The charcoal I used was General's compressed charcoal and the paper used was 11"x14" Canson XL Bristol.  My first attempts I tried the textured side of the paper but I didn't care for how the charcoal was blending so I started from scratch and used the smooth side instead.  I liked that much better.  Initially, I covered the majority of the ink drawing with a mid-tone grey using a dirty chamois cloth .  I then lifted out the areas on the roof and silo that reflected the most light with my trusty Papermate Tuff Stuff eraser stick.  Lastly, I added the darkest darks.  The texture in the trees are a combination of ink work and charcoal.  

Here was the main lesson I learned from this one.  The light source was actually coming from behind the building to the right, so there wasn't much contrast on the face of the barn.  In retrospect, I think I could have made this a better image (with more contrast) by taking some creative license and changing the light source rather than following what I saw in the original photographic reference.  I'm learning.  Overall though, I like this piece.  I had so much fun with this technique that I had to try another:

Walnut Grove Schoolhouse
Walnut Grove Schoolhouse, 11x14, Ink & Charcoal
Copyright 2013 Sarah Diane Salisbury
I followed the same basic process as before, but with this one I did use a ruler to help me get straighter lines.  Also, I used a kneaded eraser to lift out areas of sky light from the trees.  This is from another original photo reference of mine of an old one room school originally built in 1912 in Sand Creek township, North Vernon.  In 1990, it was cut into three pieces and moved to Muscatatuck Park in North Vernon for preservation.  I added the two little school girls from imagination because it made me think of Mary and Laura from Little House on The Prairie.

That's it for now folks.  I'm trying my hand at pastels right now so I'm looking forward to sharing some new things really soon.  I also invested in a nifty little HD camcorder and my goal is to (eventually) create a few video tutorials of my own.  So stay tuned!

Thursday, March 29, 2012

Water Plus Color Equals Fun!

To celebrate this beautiful spring weather I did a two  5x7 watercolors this evening. What better way to think spring than pastels and little birds?
I used Strathmore watercolor paper and my Windsor and Newton field set.
I am posting directly from my phone for the first time so I hope this goes through ok.  I'll edit it and add more tomorrow!


Friday, March 9, 2012

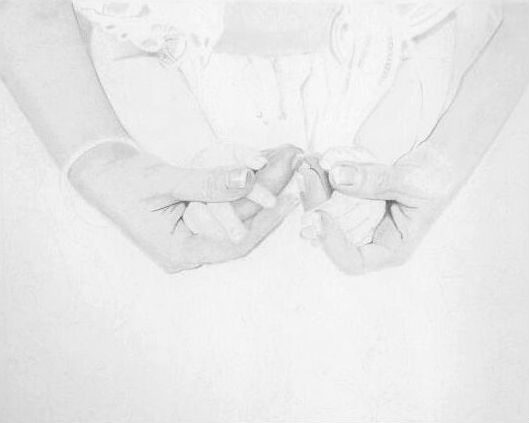
Project Update: Loving Hands

I did a little more work on this one the other day.  Here are two more work-in-progress updates:


Hoping to get some serious drawing time in this weekend so stay tuned for more!

Tuesday, March 6, 2012

Almost Finished and Just Starting

I'm almost finished with my "Modern Mona" drawing.  Here is a progress image:
I've decided to set this one aside for just a bit until I can figure out what to do next because it just isn't RIGHT yet and I can't quite put my finger on what I need to do next.  Soooo.... in the meantime, onward with a new project!

I have three works-in-progress to share with this one.  First is the basic outline.  I did this dark so it would photograph and you could see it.  But then I practically erased all of the lines until they were almost "ghostly"...

The second WIP I put in the first layer on the mother's arms with an HB pencil and blended with a chamois. Chamois are great for blending smooth skin tones!


Now I'm getting to the good stuff- the part where you discover your range of tones and things start to "pop"!    Layering the HB now to add definition and using a little bit of 4B to start to define the shadows.  And below, on the left where the baby's thumb rests on her mommy's finger, is a teeny tiny bit of 9xxb.  Just that one little dark spot and the lightest spot (which will be the light reflection on the mom's thumbnail on the left) will help me to determine the rest of the tones in the drawing.


In the past I've always worked a drawing from left to right since I'm right handed and didn't want to smudge my work.  I don't know if I've become brave or foolish for doing it this way instead, but we'll find out.  This might be a good time to get out my brand-spanking new drawing bridge to use and review for you!

Until next time, may the wind be at your back and a scenic view be in front of you!!

Tuesday, February 21, 2012

Modern Day Mona

Here is an image of one of the projects I am currently working on that I'm thinking of calling Modern Day Mona:


I still have a LOT of details to add before this will be complete but I think it's coming along nicely.  I used layers of HB blended with a chamois, then 2B for the skin tone (which is very smooth looking right now but it won't be much longer).  I used a 9xxb for the pupil and a combination of 2B and 4B for the irises.  The hair is 2B, 4B and a little 9xxb.  I didn't really know what I wanted to do with the background of this drawing so it sat on my drawing table, untouched, for nearly two weeks intimidating me.  So, last night, I just jumped in and started randomly applying graphite with some General's graphite sticks (2B, 4B and 6B) and blended my graphite "splotches" with a cotton pad.  With the first layer I thought "Oh no, I've just ruined this whole thing!" but I kept on layering and blending.  Finally, the drawing itself seemed to decide what it wanted the background to be and now I have a clearer image in my mind of where to go from here.

To get you caught up with the procedure up to this point, here is a pictorial summary of the work in progress:


Stay tuned for more updates!!!!!


Friday, February 17, 2012

Classic Romance

Here is the finished project from my sketchbook, titled "Classic Romance"


I did take one other WIP photo before the final piece (see image below).  I was reluctant to post it because I took the picture with my phone and it's a little bit blurry- please accept my apologies!  I did use a touch of 4B to detail the draperies.  I love, love, love my Paper Mate Tuff Stuff eraser stick!    It really helped me to fine tune the whites in this drawing.  You can sharpen it with a pencil sharpener or use an exacto knife to get the type of point you want. 


I had fun working on this little project.  It's time to get back to original three projects I was working on before I became distracted.  In my next post, I think I'll show you my progress and info on "Modern Day Mona".  See you soon!

Wednesday, February 15, 2012

Romance Inspired Project

Inspired by Valentine's Day, I decided to do a "quick" drawing of one of the most famous couples of all, Scarlett O'Hara and Rhett Butler.  I'm posting three work in progress photos of what I have so far.  I'm thinking it will take about one to two more hours to complete.  Really, that is "quick" for me.  I'm just doing this one in one of my sketchbooks.

  • The sketchbook is a "Cachet" by Daler Rowney.  It's a decent quality, 10" x 7", spiral bound sketchbook with a sturdy black cover.   The paper is a soft white color and provides a decent black/white contrast. The texture of the paper doesn't have a lot of tooth but it has plenty enough for basic sketches and simple drawings.
  • The drawing is about 6.5" x 8.5" in size.  I've used an HB and 4B mechanical and a Kimberly 9xxb graphite pencil so far.  I like the 9xxb for the dark value it provides without the graphite shine but it is a little grainy (not as smooth as a conte).  I applied a light layer of HB on their faces and used tissue to smooth the skin tones. I lightly layered 4B on the background and used a combination of tissue and blending stump (for the tight areas) to blend the background.  For the darkest areas (stripes on the dress, suit, hair) I've used the 9xxb.  I'm still experimenting on blending techniques with this pencil as it is rather new to me.

Here is the first work in progress (WIP).  It shows the general layout and the blended background:


The second WIP using the Kimberly 9xxb for the darkest areas.  This is about an hour into it:


The third WIP, about ninety minutes at this stage and almost bedtime so I decided to make this my stopping point.


I'll be posting more updates on this very soon.  I've also got three other projects in the works so I should have a lot to share in the upcoming months!  Hope everyone had a happy Valentine's Day!

Friday, February 3, 2012

Lorikeet Study

Lorikeet Study

I've been quite busy working on several graphite drawings at once right now, but I took a little break from them to do a quick study of a Lorikeet.  They are such beautiful, colorful birds!  I'm thinking about doing an 8x10 acrylic painting of this one- maybe- I don't know for sure yet.  For the study,  I just used some student grade semi-moist watercolors I'd found in storage.  I'm not sure where they came from or what the brand they are.  I wish I knew because then I could avoid using them again- way too grainy!  After the base colors dried, I did a little detail sketching with some of my new Faber-Castell Pitt Artist Pens.  I just LOVE my Pitt Pens!!!  I think I'm going to really have some fun with these!

More to come!

Thursday, January 19, 2012

A Whole Lotta!

It's been a long time since I've posted anything here as life has been very, very busy for me.  I hope now that things have settled into more of a routine I can get back into blogging more often.  I've done a few things here and there but not as much as I would have liked.  I only did one commission last year,  Sleeping Beauty

Also, I did a series of Universal Monsters for Halloween


And just recently, I drew Demeter, Goddess of the Harvest as part of a Draw-Along on Deviant Art.
The reference photo for this one was provided by Christina Otero and I highly recommend you check out her work:  

I'm working on several drawings at once right now and I really hope to start posting regularly again!


Friday, October 1, 2010

Pioneer Kitchen

Here is a 5x7 ink & wash (aka pen & watercolor) that I recently did. I really like the pen & watercolor "look" so I thought I'd experiment with it for a little while. Someone once told me that if you can master watercolor, you can master any other medium as watercolor is one of the most difficult to work with and control. I don't know if I entirely agree with that statement. In my opinion, watercolor is kind of fun and I'm looking forward to learning more about this medium.

For this painting, I used a reference photo that I had taken at the Pioneer Village at Spring Mill State Park earlier this year. One thing that I forgot to remember... when using a reference photo, you don't have to do it EXACTLY like the photo. I can think of quite a few ways I could have made this composition better by removing and moving around some of the elements. Lessons learned! I may do this one again just to see what kind of improvements I can make to it.

Wednesday, August 18, 2010

A Boys Life: Growing Up


Well it's finally complete! At least, as complete as my drawings can be until they leave my presence because I often get them back out and tweak them here and there. I hope you like this one! Now it's on to the next one... and I'm pretty sure it won't take as long!

Wednesday, December 16, 2009

Extended Away


I've been away for awhile but am hoping to be back into the swing of things right after the holidays. I haven't finished my Boy's Life drawing yet, nor have I given up on it. More updates on that in the near future. Until then, here is a little sketch (ACEO size) that I'm working on.


Thursday, August 27, 2009

Musical Musings and WIP update

Slow ride ... take it easy!! I love to listen to music when I draw. My favorite music is probably classic rock but I wanted something a little different to help me pick up the pace on this drawing and boy did I find it. I did a little searching for some instrumental songs and here are the one's I downloaded from either Amazon's or Walmart's mp3 sites (whoever had either the best sounding tracks or better price-- all other things being equal):

Apache- Jorgen Ingmann
Wipe Out- The Surfaris
Green Onions- Booker T & The MG's
Out of Limits (Lp Version)- The Marketts
Pipeline- The Ventures
Walk Don't Run- The Ventures
Tequila- The Champs
Peter Gunn Theme- Henry Mancini
Sleepwalk- Santo & Johnny
and just for fun . . .
The Good, The Bad & The Ugly Theme Song- Hugo Montenegro & His Orchestra

That's just a couple minutes shy of a half hour of music and I have to say that the time goes by FAST! I can't believe how quickly time flies when I'm drawing anyway but these tunes really push my productivity as I find myself drawing in time with the music. Would love to hear anyone else's suggestions of favorite music to draw or paint to??

Monday, August 24, 2009

WIP- A Boy's Life (update)

Update on progress, which continues to be slow because I'm trying to do too many things at once. But progress is progress, right?

"A Boy's Life" is the name for this series, not necessarily this drawing. I'm not sure what I'm going to title this yet. I usually never know until it's finished and even then, sometimes I start with a certain title only to change it when I eventually think of something better.

Monday, August 17, 2009

WIP- A Boys Life (Update)

Here's my progress since this weekend. It's coming along slower than I'd anticipated but I was a bit under the weather over the weekend and didn't accomplish much of anything. I showed it to my son and he said "why are you drawing my butt mom?" I told him I was NOT drawing his butt, it's a drawing of him climbing. Seeking a second opinion, I showed one of my daughters and asked her what she thought of my progress. She said, "it looks okay so far, but why are you drawing Bubba's butt?".

I'm hoping as I progress, less focus will be placed on his backside and more will be on the drawing as a whole. We'll see if I can divert the viewer's eye to flow the way I want it too. Right now though, with that dark shadow beneath him I'm afraid my kids are right. Bubba's butt seems to be the star of the show!

Friday, August 14, 2009

Current WIP- A Boy's Life (update)

Started on my latest drawing . . . here is my progress so far:

This is going to be challenging I think. Right now I'm just moving about a bit, trying to get my base tones right (the darkest darks, the whitest whites). This is the area I've always had some dificulty with- establishing enough contrast in my drawings so they don't look flat. I think this piece will be a good study in contrasts for me.

The paper I'm using is 11x14 Strathmore Bristol Vellum 500 series. It's 100% cotton rag, archival quality, with an even, slightly textured surface and a soft white color. This is one of my favorite types of paper to use so far-- but I'm still experimenting!

I'm using a 2B Staedtler 925 mechanical pencil. I like this pencil because it's realitively lightweight and allows me a lot of control with very little "effort" when building up layers.

I started drawing with a basic set of Generals' drawing pencils. Then I discovered Derwent graphite pencils which have become my favorite brand of wood cased pencils. After taking a workshop with Armin Mersmann, who primarily uses Graphgear 1000 mechanical pencils, I thought I'd give mechanicals a try, but I wanted something a little lighter to handle. It's not easy finding a wide assortment of lead grades (hardness/softness), but there's enough of a range of leads to do everything that needs to be done. I've primarily been using only 2B to "force" myself into being patient with my drawings and build tone with layers. Also, by using a light touch, I don't "crush" the paper texture like I used to- which not only creates a graphite "shine" but also limits the paper's ability to hold multiple layers of graphite.

In a future post, I'll do an overview of my studio space and the materials I use most freqently.

Thursday, August 13, 2009

New Project- A Boy's Life (possible series)

I've started a new project. This one will most likely be the first in a series with the theme of "A Boy's Life". I want to illustrate the natural, adventurous free spirit that inhabits the hearts of so many little boys out there. I got the idea when I found some old pictures of my son from a photo shoot he and I did several years ago on a "just mommy and me" excursion.


This is the picture that I chose to start with.


I figured these would be great reference photos to inspire me to practice drawing the natural textures in rocks, trees, leaves and water. What better model to have than my own boy!! Of course, he's not really a boy now but has become a fine young man any mom could be proud of. Instead of looking down at his trusting, innocent eyes, I now have to look up... way up ... and I see smiling eyes full of hopes and dreams. Enough waxing poetic, time to pick up the pencils and get busy!!

Monday, August 3, 2009

Emily- Completed

Here is the completed drawing of Emily which I delivered on Sunday. She seemed to be very pleased with it. I gave her a note with it to explain what I was trying to convey. The three rays represent The Father, The Son and The Holy Spirit. I wrote, "when you look at this drawing, remember that no matter where life takes you, over seas, thru forests and over mountains, the Lord is always there to guide you."


I feel like I'm getting better but I'm still so far from the level I want to achieve. The only way to get there is by drawing, drawing some more and drawing some more. So, it's back to the drawing board. . . wonder what my next subject will be???

Tuesday, July 28, 2009

Update- Commission of Emily, Nearing Completion

Here is the image from my last post:

This is the reference I decided on for the background. I found it at a geocities website- Places of Refuge, but have no idea who the owner of the original image is. If he/she stumbles upon my page or someone out there might know, please contact me so I can give an appropriate credit to him/her. I started shading in the background as seen in the photo reference, but decided that the leaves on the right weren't going to work well with this drawing. It was at this point, where I started blocking out the rays of light, that my ruler transferred the sticky substance to the drawing (see previous post). Because of that, I had to change my approach and go much darker with the background than I intended in order to "hide" the stains.
Layering, layering, layering!

Added a bit more detail to her blouse so it didn't look so two dimensional. Went a little too dark with the background on the right so I'll have to add another layer on the left to keep this in balance. As you can see, I still have to finish laying in her hair too. And her teeth are just a bit too bright. I read somewhere that the whitest part of a portrait should be the hightlights in the eyes. Not the whites of the eyes, but the highlights- the "sparkle" in the eye.
I'm also considering removing the heart shaped necklace and giving her a cross necklace to keep with the "theme" of this portrait. I know Emily from church. She's a sweet young lady, very active with the youth ministry. I wanted to remind her through this portrait that, over seas, forests and mountains, no mater where on earth her life travels take her, our Lord in Heaven is watching over her.